
Setup Guide for VRChat (Worlds and Avatars)
Packages (.unitypackage) downloaded from VRPrintLab come with all colors and prints already set up. Just import them into your Unity project and place the Prefab.
The screenshots below show the Unity editor in Japanese. Button positions are the same in English.
1. Import the package
- Open the Unity project for the world or avatar where you want to use it.
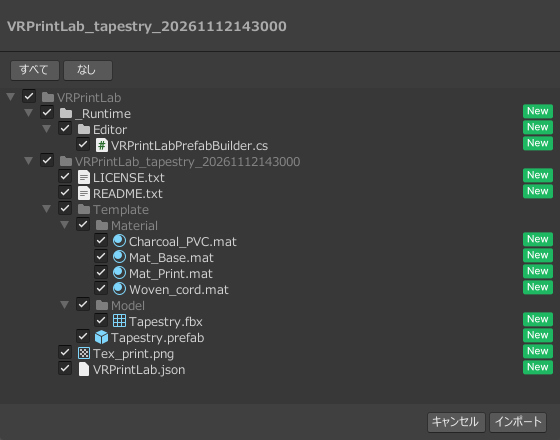
- Drag and drop the downloaded .unitypackage into the Unity window.
- When the confirmation window (Import Unity Package) appears, click "Import" at the bottom right.
2. Find the Prefab
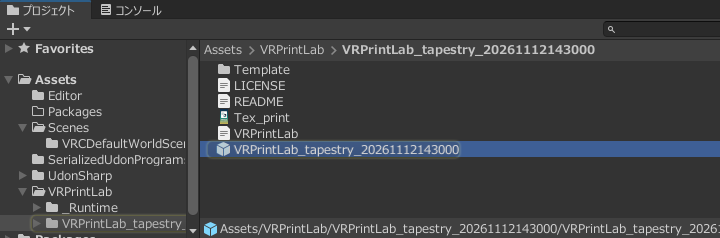
When the import finishes, the finished Prefab (blue cube icon) is created automatically in the Project window.
- Location: the folder inside
Assets/VRPrintLab/with the same name as the downloaded file - Name:
VRPrintLab_<template>_<date and time>.prefab
3. Place it in your scene or avatar
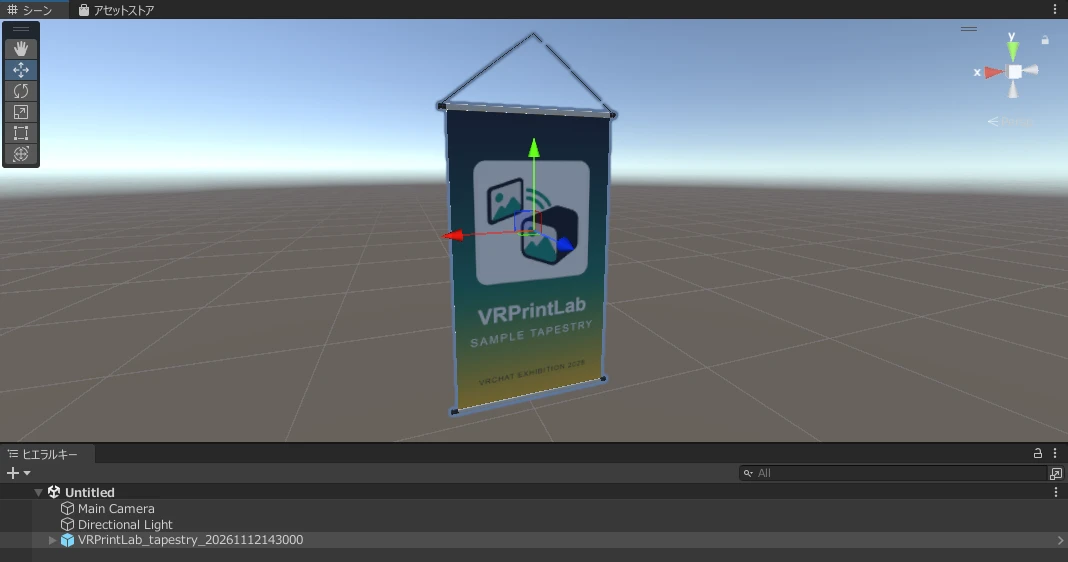
Drag and drop the Prefab into your scene (Hierarchy) or avatar, then adjust its position, rotation, and scale. You're done.
Troubleshooting
- If the Prefab isn't created, run Tools > VRPrintLab > Prefab をすべて作り直す (Rebuild all Prefabs) from the menu.
- Gimmicks only work in worlds, because they use UdonSharp. If they don't work, add UdonSharp with VCC or ALCOM, then run the rebuild command above.
- To download a package again, open your download history.